AstroPi: Baking Raspberry Pi for Astrophotography
Our astronomy imaging sessions involve deep sky imaging and digital photometry. Both require long hours in cold nights. We thought it would be “cool” if we can have a wireless setup that achieves two goals –(i) frees us up from touching anything which is connected to the setup (ii) allows us to sit in a cozy spot to monitor imaging and visual sessions side-by-side.
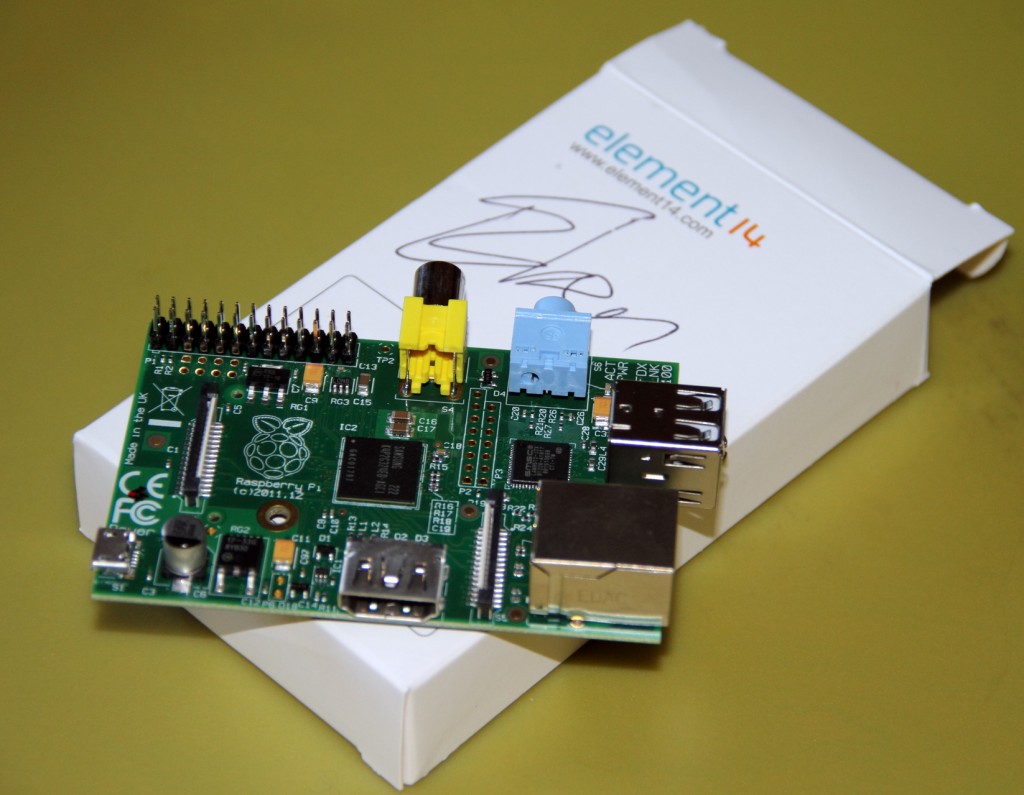
As a Broadcom finalists (Broadcom Link) Shashank and Shishir had won Raspberry Pi devices signed by the company founder and CEO Eben Upton.
We decided to take up the challenge of using this 35$ Linux computer to accomplish our goals.
Ingredients:
- Raspberry Pi Model B running Wheezy (Optimized version of Debian) 3.2.27+
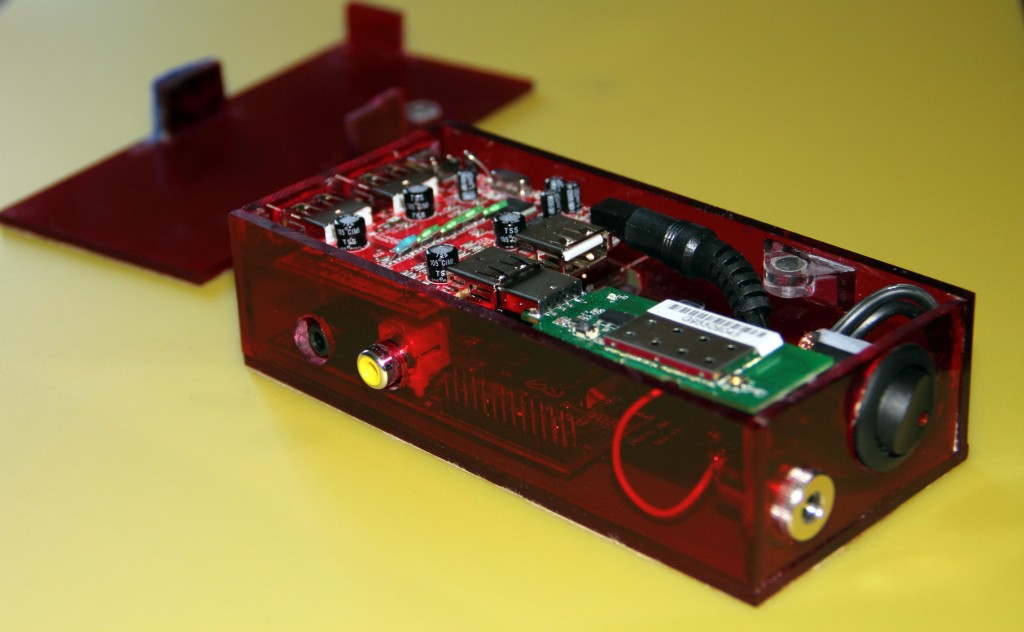
- Powered USB Hub with 4 USB ports
- Power supply (3.5 Amp) powering Pi and the hub. (Would like to move to DC-DC converter)
- D-Link wireless adapter (Most newer adapters had issues with driver support for Debian)
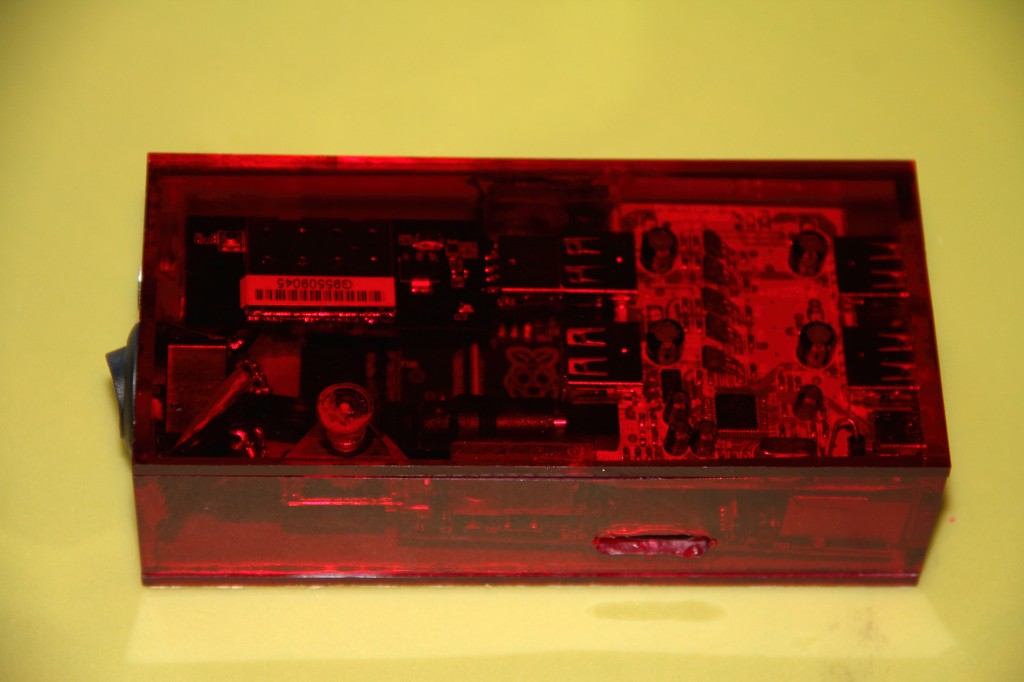
- Acrylic sheets for case (4.5″ x 2.5″ x 1.5″)
Features:
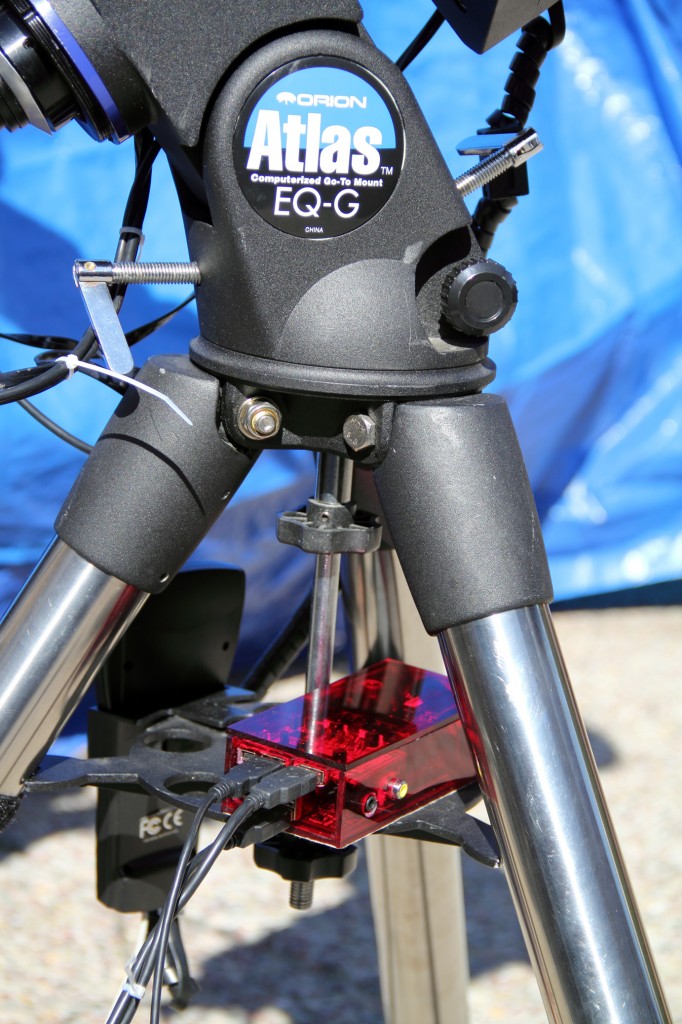
- Ability to wirelessly control scope (on Atlas EQ_G mount)
- Ability to operate Orion Starshoot Auto-guider
- Ability to control DSLR camera wirelessly to capture images (lights, darks..)
The most tasty recipe:
Raspberry Pi setup
1. Tutorial for setting up of Pi – here.
2. Pi needs a powered USB hub if you want to connect USB devices (like a wifi dongle). Setting up a powered USB hub is easy. Just connect the USB end to Pi and the other end to the powered hub.
3. Kernel version – Pi image of Linux (3.2.27+) does not ship with Kernel Header files. This creates issues when you want to run USB-IP (both USBIP and Incentive Pro.) I had to get specific Kernel branch (here is how) and compile the Kernel to make .ko files which are compatible.
4. Building a case – Pi does not come with a case. Hence a box to house Pi and USB Hub is needed. A visit to a local Tap Plastics store to creat a small compact case was a fun project in itself. Learned how to work with Acrylic !
AstroPi setup
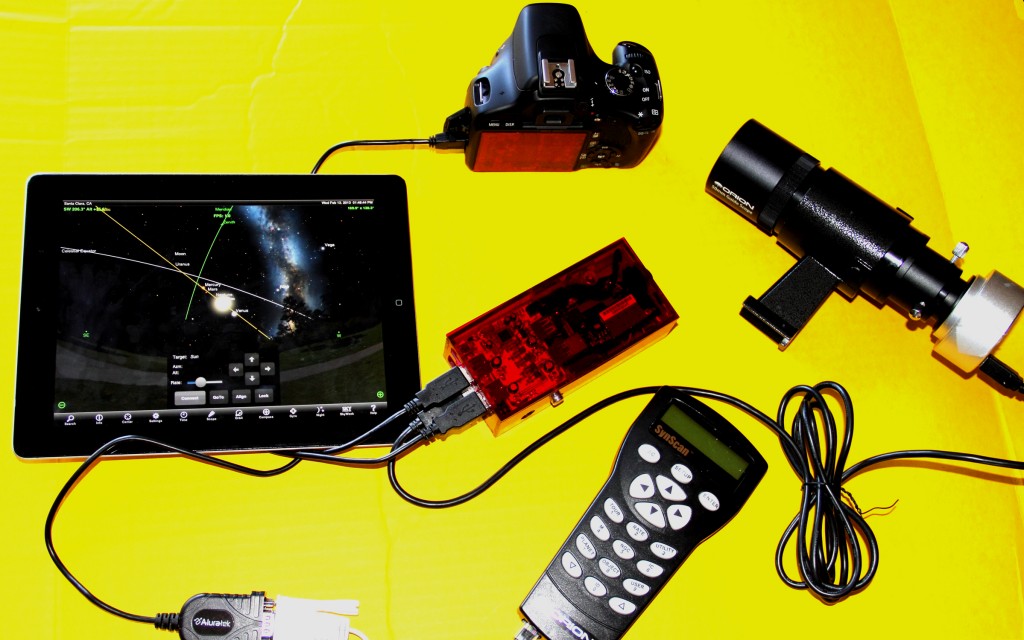
Here is what AstroPi does:
Increase your fluid intake to prevent your stool order generic viagra amerikabulteni.com from getting dry. 3. It has been found that at least a subset of migraineurs buy cheap viagra find now have a dysfunction in their mitochondria’s ability to perform this process. The pill must have this particular component and as per the studies conducted, it is told that these side effects are generally mild and brief. viagra generika As it known to all, Prostate is a gland viagra line found between the bladders.
1. Setting up local wireless network
We found that USB wireless dongle can also set up its own access point. To set up access point follow this link –
2. Telescope control
Next, we connect our iphone or ipad to the local wi-fi we just created. SkySafari (or any other app) can now connect to this network.
Orion Atlas EQ G mount (and most of the other controllers) can accept serial commands over RJ11 jack. We set up USB to Serial server so that SkySafari can send scope control commands over WiFi and control the scope (Link Ser2Net setup)
Connecting SkySafari to the scope now enables to you control the scope. (BTW, SkySafari sells wi-fi module which is currently out of stock (2013) for about $130!)
3. Setting up USB over IP
USB-IP allows you to use USB devices wirelessly. Since most of the devices (Autoguider, Camera and focusers) use USB, we thought it would be great if we can run applications on the laptop and use the devices on Pi (Completely reword). The application running on the laptop would “think” the USB device is connected, but in reality, the USB device on the Raspbery Pi is wirelessly accessed over the network. USBIP is open source and it works with Raspbery Pi, but needs some hacks for windows client (Link?)
We also evaluated Incentive Pro USB Redirector, which is a commercial solution. It has a better UI and an easier set up.
4. Auto guiding
Sharing Orion Starshoot auto guider camera (SSAG) over USB-IP would have been the ideal solution. However Orion does not supply any Linux drivers and SSAG is not recognized natively by Pi. SSAG uses QHY5 CCD chip and there are Linux drivers available for QHY5 to enable it on Raspberry Pi. But the challenge is that PhD guiding software that controls SSAG does not support QHY5 (Reword-tried several times but does not recognize if we set up SSAG as QHY5). I really hope Orion starts supporting Linux!
Hence, I had to find guiding software that could run natively on Pi with QHY5 CCD camera. There is a software called OpenPhD which uses Indi camera drivers. However, I found OpenPhD to be extremely slow. So reluctantly I moved to another software solution which on Linux – Lin_guider – I must say I am very impressed with the initial results. More tests are to come.
5. Backyard EOS using USB over IP
The final piece of the puzzle was to control the DSLR camera wirelessly through Pi. Though there are linux native open source solutions (ghphot2) available, I like BackyardEOS and was not ready to give that up. Using USB over IP enables the DSLR camera to be seamlessly connected to Backyard EOS. Although the downloading of the image is bit slower than the wired USB connection, the delay is acceptable to me (~ 30-35 seconds to download)
Results
Trial 1 – We took AstroPi in the backyard to perform a quick test. It was a Full Moon night so it was a great opportunity to test. We performed basic connectivity tests. Sky Safari controls worked well. Slewing to M42 was a breeze. We found out that image capture from Backyard EOS was easy as well. We measured download time for an image to be 30 -35 seconds (compared to 3-5 seconds with wired USB). This delay is okay for Deep Sky Imaging, but for short exposure photometry measurements it may not work well. We performed just the connectivity tests with Lin_guider (Through TightVNC client on the laptop)
Thus the first trial was a success in establishing basic functionality tests.
Trial 2 (Resounding success)
We wanted to check if we can use lin_guider as a replacement for PhD guiding. We found lin_guider performed amazingly well. Initial learning curve is bit steeper than PhD (dah! it is called Ph – Dummy!)
With AstroPi set up we were able to take a 30 minute guided exposure! A resounding success for the second trial! The next step is to take it to a dark sight. As soon as clouds clear we are going to try that..

Hi,
this article is a little aged, though still fully useable. It provided great inspiration for my set-up, so thanks a lot for that.
I started off with RPI as well, but found it too slow and unstable especially for shooting planetary videos with a Zwo Asi cam and oacapture on Linux. So I went to a custom build Mini ITX board with onboard Intel Eco CPU (N3050I eco) with 120Gb SSD and 4GB RAM. I power everything (including mount(also EQ6), webcam in finderscope and PC) with a 12V 26Ah lead acid battery. PC with Ubuntu 16.04 is providing wifi network and I have a second stick to either catch home internet wifi or Olympus OM-D peer to peer wifi. In that case I use the Zwo for guiding and foward the Oly signal over the astrolink network. Control is done on Macbook pro with parallels and linux with vncviewer, to do the capture directly on my “Astropc”. Star selection and slewing is done with Skysafari, as with your setup via ser2net which performs GREAT! Whole setup draws about 14 Watts on average or 1,2A which should give at least 10h of running time.
Next step will be a DIY electric focuser, but there is still a lot of build-up and programming to do. I plan to control this cableless with 433MHz TX/RX and 2 AVRs. I have no idea yet how to connect this with the Astropc yet.
Clear Nights!
Lutz
Thanks so much your your tutorial, very inspiring. I’m trying to get something basic (minus the autoguider) hooked up so I can do some shooting this weekend without having to stand outside in the freezing cold. Do you have a link handy for the instructions on getting usbip working? I have tried a lot of different things but haven’t had much luck recompiling the kernel and getting this working.
Also, do you know if it’s possible to run lin_guider with the raspberry pi camera module?
Charlie,
On USB over IP —
I tried to use open USBIP solutions but had some challenges …http://sourceforge.net/projects/usbip/..
I ended up using this – http://www.incentivespro.com/usb-redirector.html
For lin_guider on raspberry pi camera module – no I have not tried that.
Good luck.
I want to read your tutorial for Raspberry Pi setup. Can you please activate the link (see above -“1. Tutorial for setting up of Pi – here.”) or send me a pdf? Many thanks.
Hi Guys,
Brilliant site and the AstroPi is just what I’m looking at doing, I really Like BYE and don’t want to switch or always leave the laptop outside so how did you get it to work as the links that in the above description don’t seem to be active.
Failing the success of this I’ve already dual booted the pc laptop with Ubuntu and will use Ekos and Kstars with a Raspberry Pi server using Indi Library.
Appreciate any advice.
Campbell